9 The Serger

Learning Outcomes
By the end of this unit, you should be able to
- Correctly thread the Costume Shop Serger for a 3 thread overlock stitch.
- Serge straight edges, convex and concave curves.
- Change the settings to achieve a rolled hem edge.
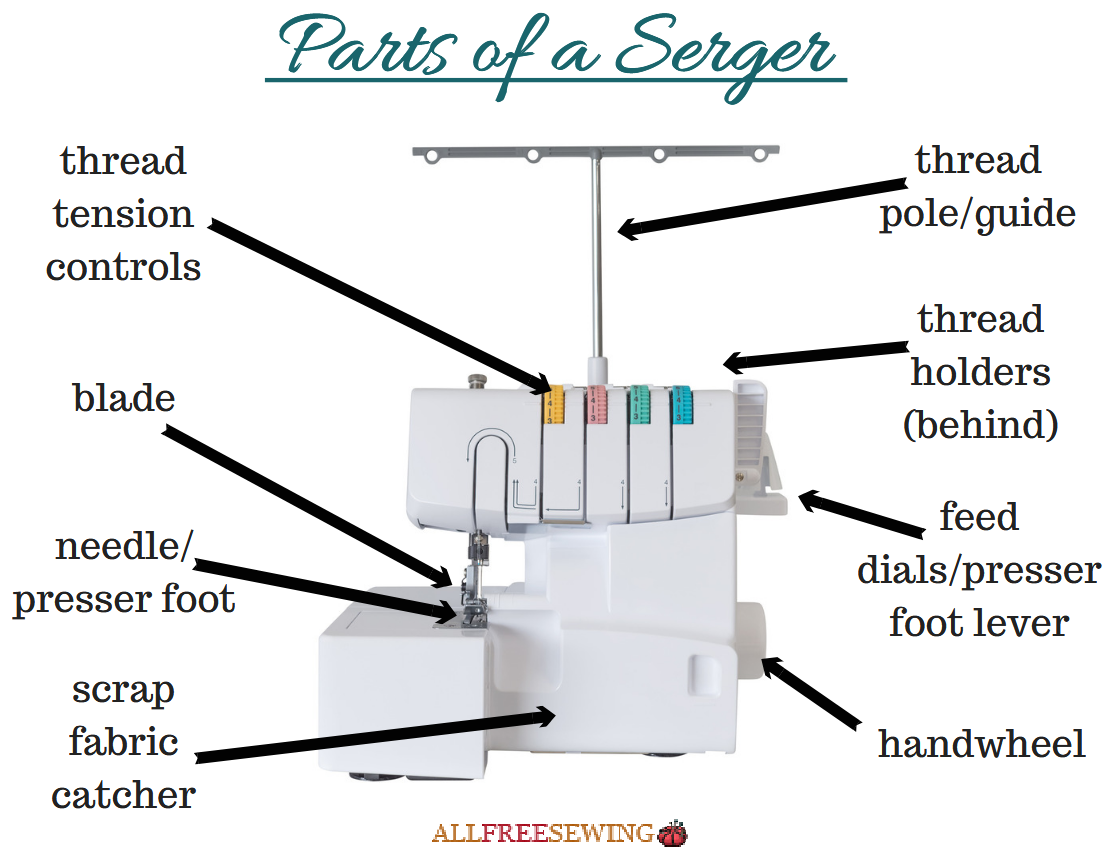
What is a serger?
A serger, sometimes known as an overlock machine, is a type of sewing machine that trims raw edges and finishes or ‘overlocks’ them. It does so using a complex chaining method involving three or more threads, creating a stitch that encloses the raw edge and prevents fraying. Sergers are commonly used for commercial garment making.
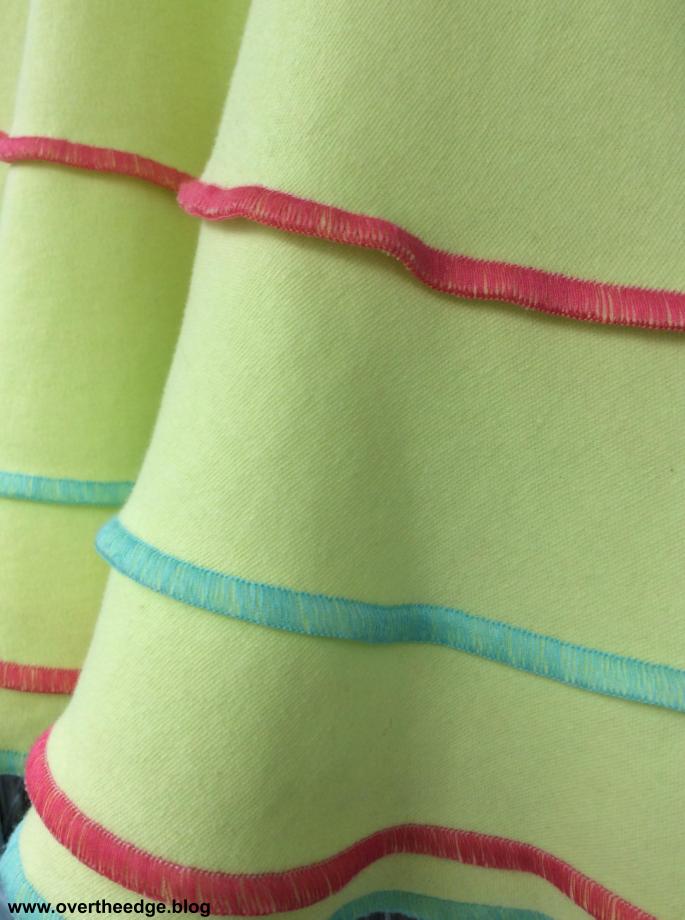
In the Costume Shop
In the Costume Shop, the serger is rarely used to assemble garments as it does not leave enough seam allowance for future garment alterations. It is more commonly used to create a variety of decorative finished edges or bind seam allowances to prevent fraying and extend the life of the garment.
 |
 |
 |
 |
Threading the Serger
Threading the serger can seem overwhelming, as it involves navigating a series of tensioners to thread an upper and lower looper and 1-2 needles as well as choosing multiple appropriate settings for your desired stitch. However, with a pair of tweezers, patience, and practice anyone can successfully navigate the process. Most machines feature a color-coded step-by-step guide on the inside cover of the lower section and a guide to stitch settings.
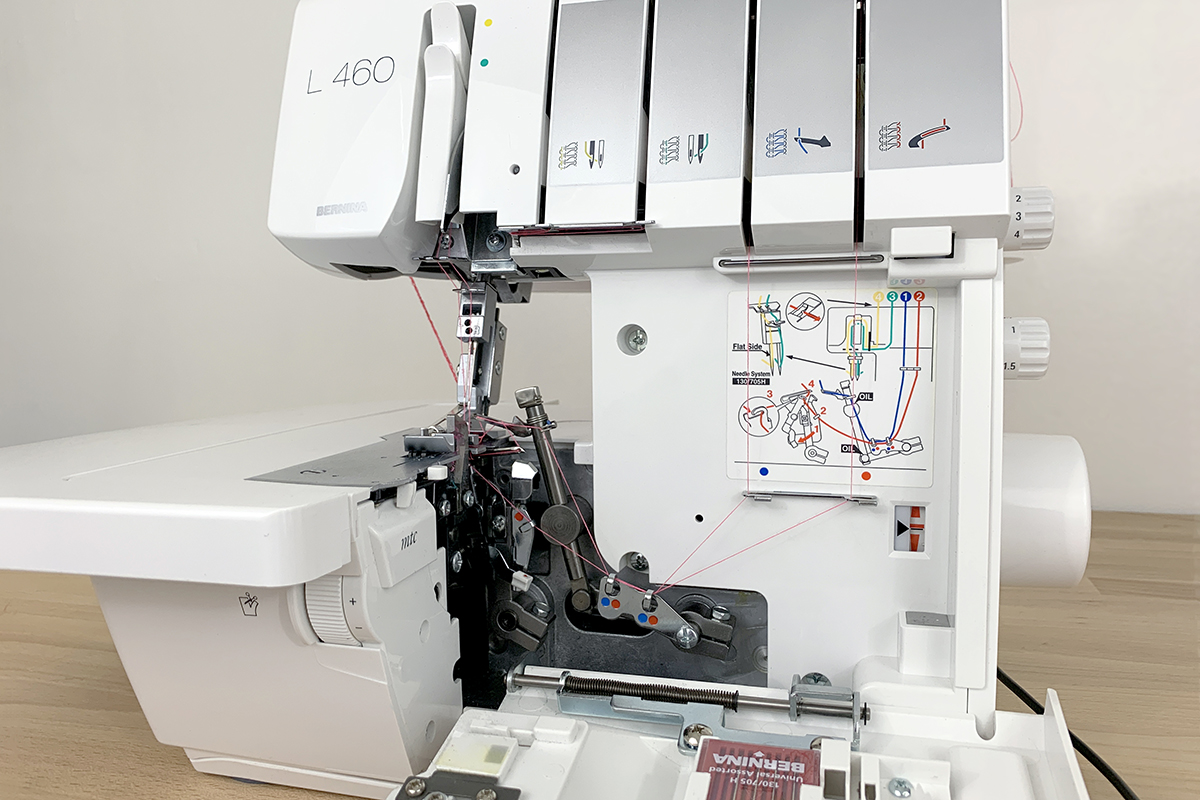
Threading the CMU Costume Shop Serger
🎥 Demo: How to Thread your Baby Lock 4 thread serger with Jet Air Threading
Get a close up step-by-step walk through of threading the serger.
Using the Serger
-
Before you begin, remember:
👉 Select the right stitch type for your project.
👉 Test your settings on scrap fabric.
👉 Let the machine do the work—don’t push or pull the fabric.
1️⃣ Choose Your Stitch Settings
-
Select the stitch type based on your project and fabric:
-
3- or 4-thread overlock for seams
-
Rolled hem for finished edges
-
-
Adjust stitch length, differential feed, and tension as needed.
-
Refer to the serger’s stitch guide inside the machine cover.
2️⃣ Test on Scrap
-
Before sewing your actual piece, serge a scrap of the same fabric.
-
Check for:
-
Balanced tension
-
Proper stitch length
-
Desired edge finish
-
-
Adjust settings as necessary.
3️⃣ Align and Seat the Fabric
-
Align your fabric edge with the guide on the serger’s footplate or the blade.
-
Remember: Anything to the right of the cutting blade will be trimmed off.
-
Lift the front of the presser foot slightly by hand to slide in the fabric OR feed it in as you begin sewing.
-
❗ Do not lift the presser foot fully to begin or end a seam.
4️⃣ Start Sewing
-
Gently press the foot pedal to begin stitching.
-
Guide the fabric smoothly—no pushing or pulling
- Let the blade trim the edge as you go.
5️⃣ Finish the Seam
-
Continue stitching 3-4 inches past the end of your fabric to create a thread chain tail.
-
Cut the tail neatly with snips or the serger blade.
6️⃣ Clean As You Go
-
Every 10 minutes or so, open the threading doors and spray with canned air to clear lint and dust.
🎥 Demo: Seam Finishing on a Serger
Watch how to trim and bind a raw seam allowance edge with the serger.
💡 Serger Quick Tips
-
Begin and end seams with a 3-4 inch chain tail.
-
Never lift the presser foot to start or stop stitching.
-
Let the machine feed the fabric; don’t push or pull.
-
Only serge straight lines and curves — no corners.
-
Clear lint and dust every 10 minutes for best performance.
-
-
Assignment: The Serger
Supplies
- (3) 8 x 10 sampler pieces
- scissors
- Pencil or fabric marker
- serger threading and stitch setting guides
- cone thread
INSTRUCTIONS
- Label samplers for exercise name with a sharpie and put each in a separate sheet protector in your Sampler Binder.
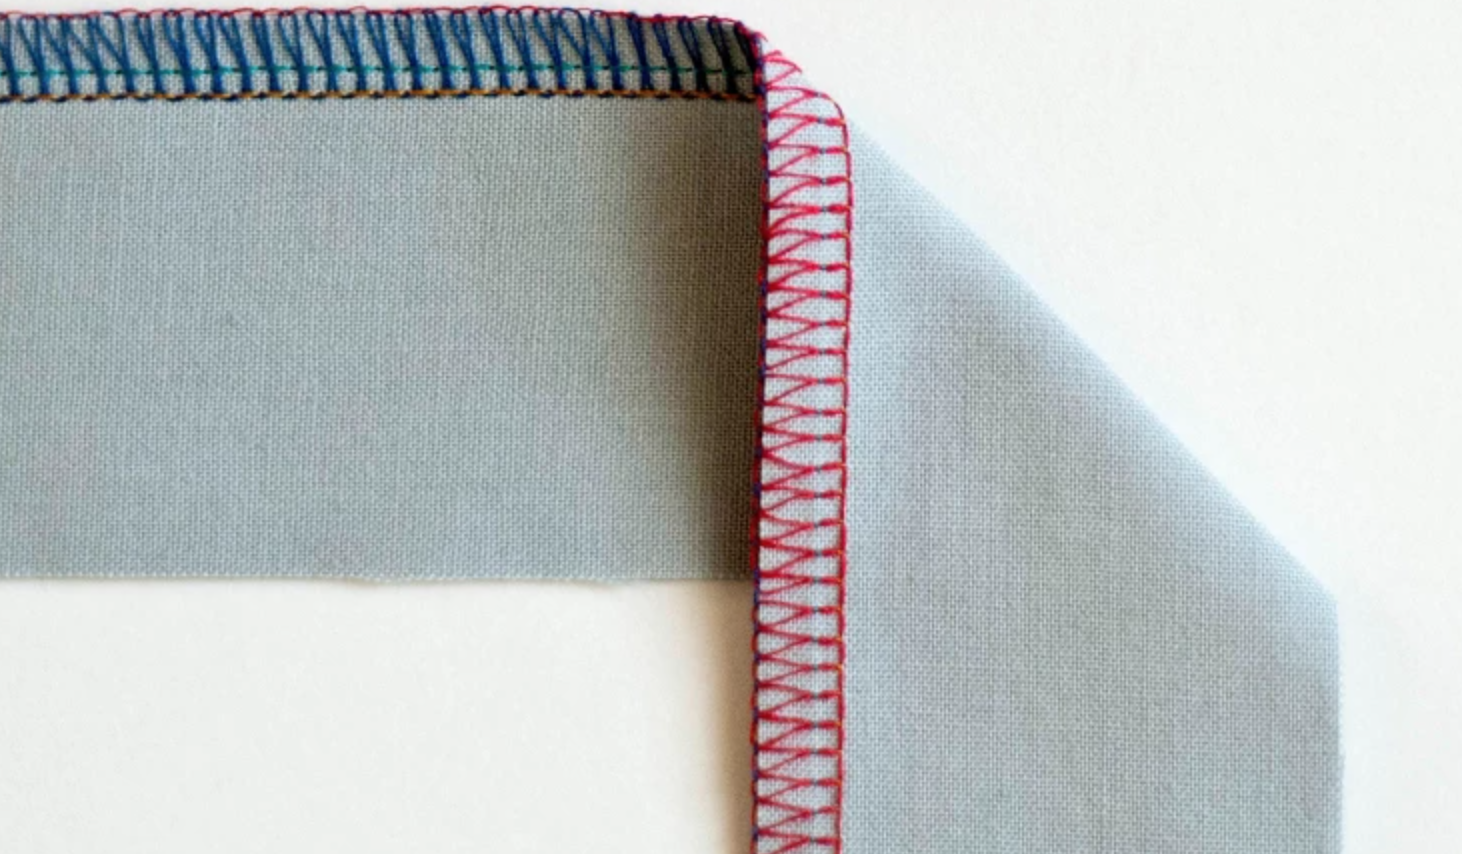
Overlocked edges
- Thread serger for 3 threads, any color.
- Set it 3 thread narrow overlock stitch.
- Serge all four edges of one 8 x 10 sampler.
- Trim threads neatly.
Convex and Concave Curves
- Draw a curve on one 8 x 10 sampler to create a convex/concave curve that does NOT extend all the way to the corner.
- Cut into 2 pieces on the line you’ve drawn, creating a convex and concave curved piece.
- Serge all edges, using techniques for curves and straight edges.
- Trim threads neatly.
Rolled Hem
- Referring to the serger settings chart, adjust settings for a 3 thread rolled hem.
- Roll hem all four edges of one 8 x 10 sampler.
- Trim threads neatly.
