Want to create or adapt books like this? Learn more about how Pressbooks supports open publishing practices.
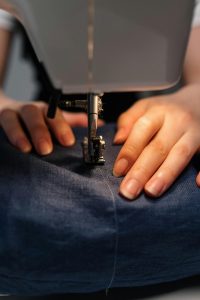
7 Basic Seams
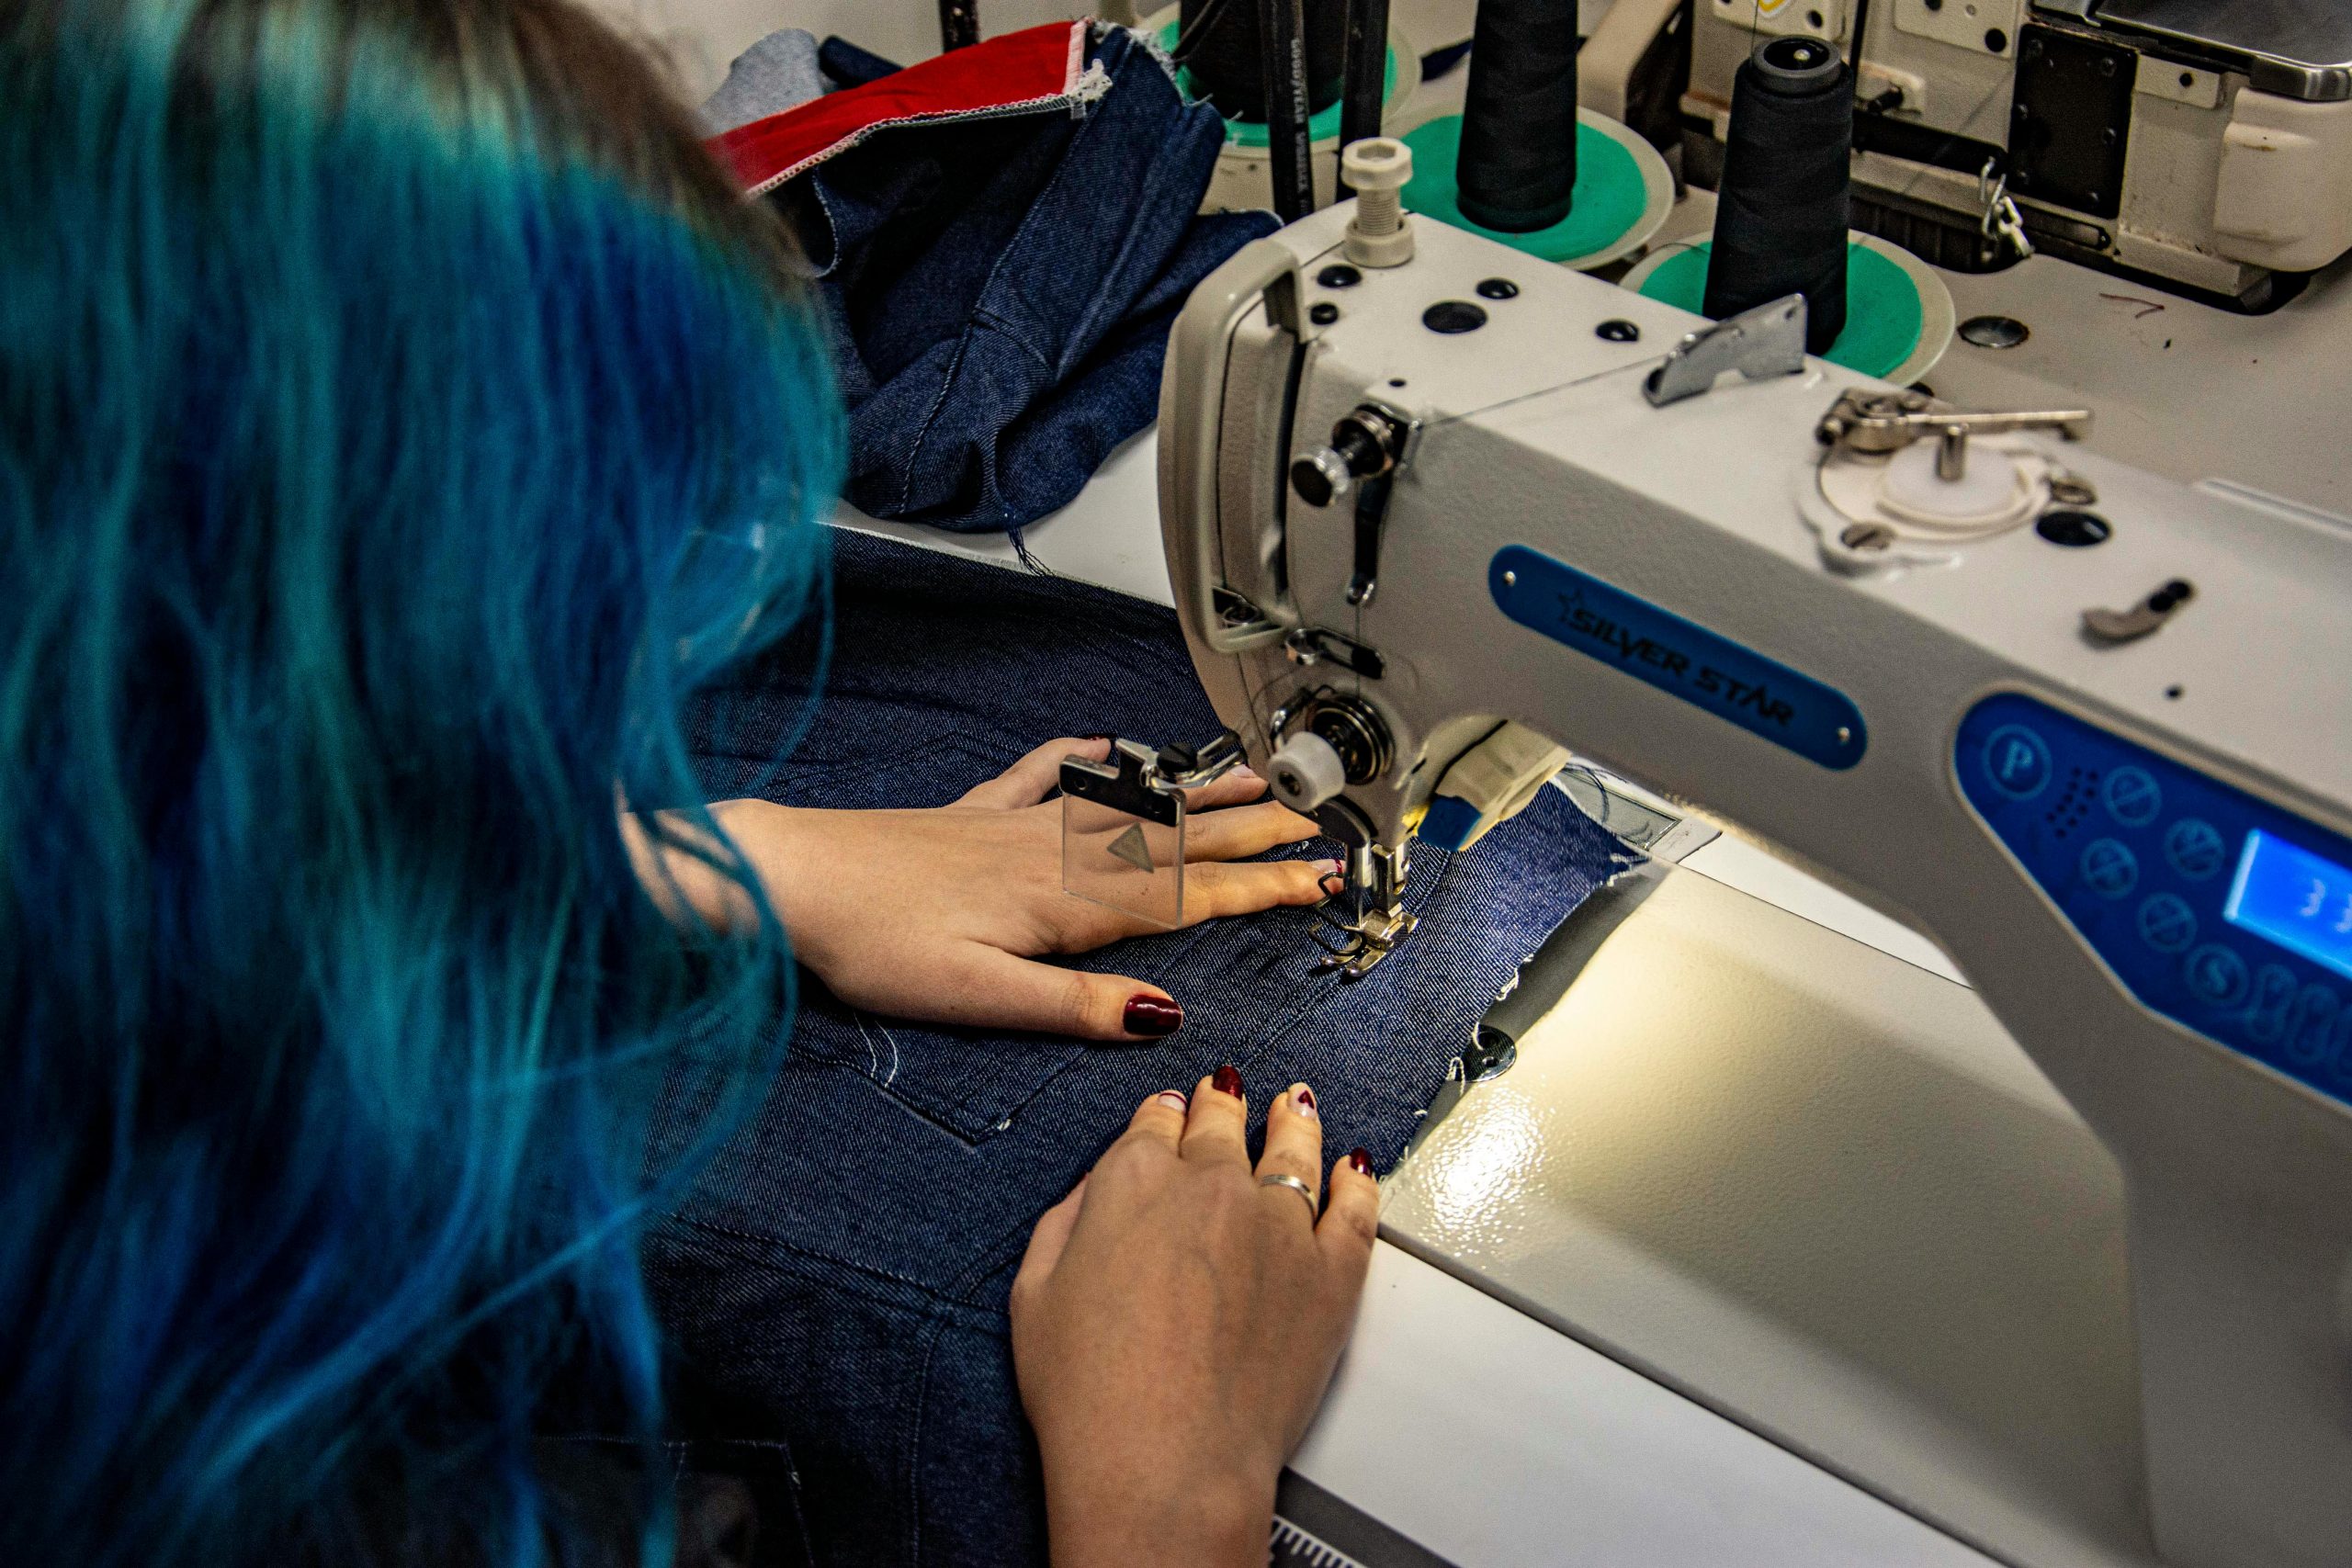
Photo by Rodolfo Gaion
Learning Outcomes
By the end of this unit, you should be able to correctly execute the following:
Manipulate stitch length, width, and directionality according to need
Perpendicular pinning and edge-referenced seam allowances
Parallel pinning and stitch line matching
Basic seams
Topstitching
Directional seam allowance pressing
Tips For Safety and Efficiency
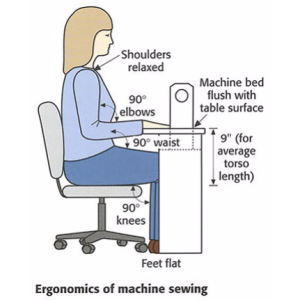
Posture
Sewing can be tension inducing and tiring for the body. Adjust your chair and machine to position yourself correctly to for maximum visibility, efficiency, control, and comfort.
Focus:
Keep your eyes on your work. There’s a moving needle aimed at your hands. Enough said.
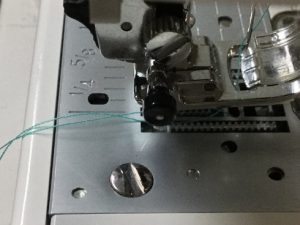
Thread Position:
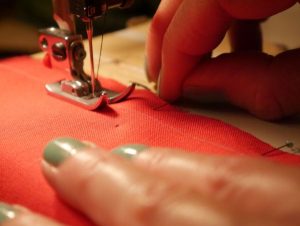
Before sewing, pull the threads under and behind the presser foot about 3 or 4 inches. Gently hold these threads when you start a new seam, otherwise the threads may get caught in the machine.
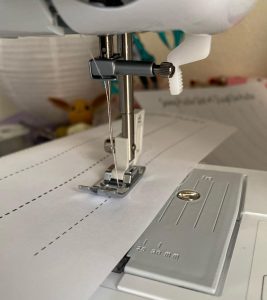
Presser Foot DOWN:
The presser foot must always be in the down position for sewing. It is the pressure between the presser foot and feed dogs that create the forward motion of sewing.
Hand Position:
Keep your fingers away from the moving needle and flat on the machine to the sides of the presser foot, to help guide the fabric as you sew.
Let the machine do the work:
Don’t force or pull the fabric. The sewing machine will move fabric automatically with the feed dogs.
Keep your Tools Close:
Use the machine’s thread cutter to trim threads as you work or use a pair of snips. Have a place to put your pins as you remove them during sewing.
Go Slowly.
Maintain even speed with your foot control.
Problems? Check your threading, especially your bobbin.
Most problems are due to incorrect threading and unseated or incorrect bobbin rotation direction.
Seam Allowance
What is it?
Seam allowance refers to the area of fabric between the stitching line and the cut edge of the fabric. The width of seam allowance varies depending on the project and needs.
Commercial patterns build in a standard seam allowance of 5/8″ as those garments are meant to fit one person.
Costume shops often use larger and varied seam allowances to allow for future garment alterations and reuse by a variety of actors.
How do you sew with the correct seam allowance?
There are 2 ways to observe seam allowance and they require different reference points and pinning strategies.
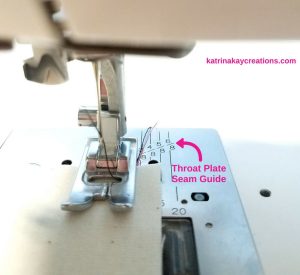
Edge Reference: built-in and consistent seam allowance (seam allowance has already been added to the pattern)
Use perpendicular pinning
Line up cut edges of fabric against corresponding seam guide on machine throat plate.
Make sure needle is in center position.
💡Tip: lining up edge of fabric with the edge of your presser foot creates a ¼” seam allowance. Each line on the seam guide is an additional 1/8″.
Stitch Lines: variable seam allowance (also commonly known as ‘stitching-as-pinned’)
Use parallel pinning, match stitch lines on both pieces.
Aim pins into the machine.
Aim needle along stitch/pin line, removing carefully as you sew.
Pinning and Stitching
There are two basic styles of pinning: perpendicular to the seam line and parallel to the seam line.
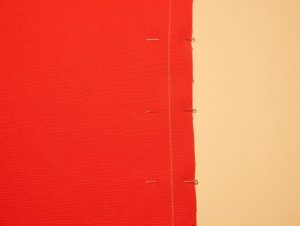
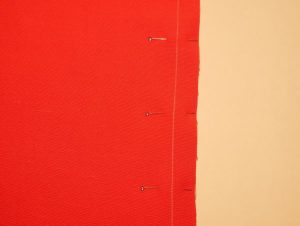
Perpendicular Pinning
Proper pinning may vary based on whether you are right- or left-handed. Right-handed stitchers most commonly place the pinhead along the cut edge of the fabric and the point toward the stitching line. This way you can grab the pinhead and remove the pin with your right hand as you sew.
Perpendicular pinning is most often used with simple straight seams or sewing with built-in seam allowance.
Pin heads facing right
Removing pins with right hand
A left-handed stitcher, however, may prefer to place pins pointing in the opposite direction. That way, they can use their left hand to remove the pins.
Pin heads facing left
Removing pins with left hand
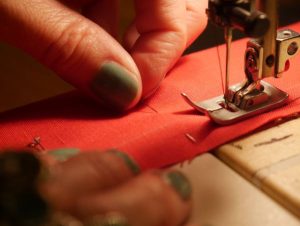
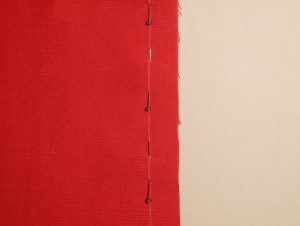
Parallel Pinning (‘Stitch as Pinned’)
Pinning parallel to the seam line (often called ‘stitch as pinned’) is most often used when sewing with lots of layers that may shift, curved pieces, when working with a fabric that will show pin marks, or projects with marked stitch lines and variable seam allowances.
Place the pins along the stitching line. Always place the pinheads toward you (pinpoints toward the machine) so you can remove them easily as you stitch.
Pins point into the sewing machine and heads toward the stitcher for easy removal while sewing.
💡Tip:To figure out the proper direction for pins in parallel pinning, do the following: hold up the work with the stitch line on top and bulk of it hanging down. In this position the pins point to your LEFT. When you put the work into the machine with the bulk to the left, the pins will point INTO the sewing machine.
Beginning and Ending Seams
Align the fabric pieces
Place the two fabric pieces right sides together (if your fabric has a right/wrong side).
Align the raw edges or stitch lines (depending on the project).
Pin layers together using the most appropriate pinning method.
Position under the presser foot
Raise presser foot and slide the fabric under the presser foot so that the needle is at the seam’s starting point.
Lower needle into fabric.
Lower the presser foot to hold the fabric in place.
Secure the beginning (backstitch)
Take a few stitches forward (3-5 stitches).
Reverse and sew over those stitches (3-5 stitches back).
Go forward again along the seam.
Sewing the Seam
Perpendicular Pinning: sew your seam, keeping the raw edge along the seam allowance guide on the machine throat plate
Parallel Pinning: sew your seam, following your stitch line as pinned, removing the pins as you sew toward them.
Secure the ending (backstitch)
Stop at the end of your seam
Reverse and sew over those stitches (3-5 stitches back).
Go forward again along the seam to the end.
Removing the Work
Manually raise the needle out of the work (if necessary)
Raise the presser foot
Pull work gently to the left and trim threads close to the work, leaving several inches of tail for the machine.
💡Tip: If the work shows resistance to being removed from the machine, pull gently with your left hand while rocking the hand wheel slightly back and forth with your right.
Pressing Seam Allowances
Pressing seam allowances is an integral part of sewing. It helps set the stitches, flatten seams, reduce bulk, make construction easier, and ensure the the final result is polished. You will always be asked to press seam allowance open or to one side.
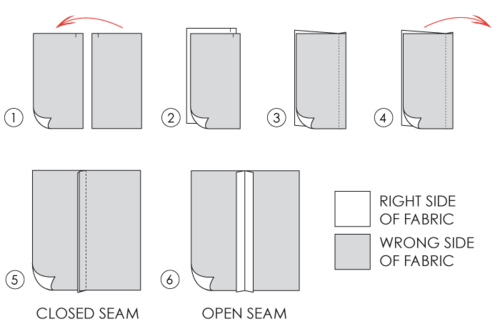
Open vs Closed Seam Allowances
Steps
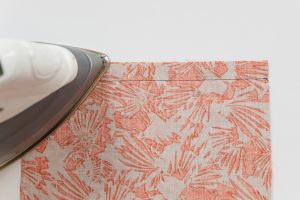
1. Press the seam flat first (pressing the seam closed)
Lay your seam as you just sewed it.
Place the iron on top of the seam (without opening it) and press down — this sets the stitches into the fabric.
2. Press the seam allowance open or to one side
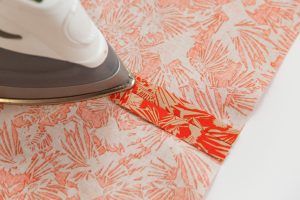
👉 Open seam allowance:
Gently open the seam so the fabric lies flat on either side, wrong side up.
Press with the tip or point of the iron along the seam line first, then press the wider allowance.
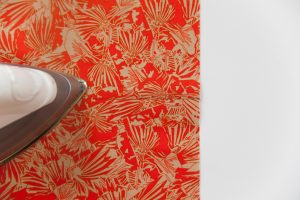
Turn over and press from right side.
👉 Press to one side:
Gently open the seam so the fabric lies flat on either side, wrong side up.
Lay both seam allowances to one side.
Press along the seam, keeping the allowances smoothly folded.
Turn over and press from right side.
Set Stitches as sewn
Press seam allowances from wrong side
Press from right side
💡Tip:Pressing is different from ironing (in which you continuously move iron). Give downward pressure and steam, then lift and move iron to new position and repeat.
ASSIGNMENT: BASIC SEAMS
Supplies Needed
Sewing machine
Thread (any color for top and bobbin)
Snips or scissors
(8) 8″ x 10″ fabric pieces with a clear right and wrong side
General Instructions
For all permanent stitching (not basting), backstitch at the beginning and end.
Label each sampler and place in a page protector in your binder.
Final Samplers (7)
1️⃣ Zigzag and Bar Tack — 3 Ways
Draw 3 parallel lines, each 8″ long and 2″ apart along the 10″ side of your fabric.
For each line:
Bar tack at each end.
Zigzag stitch along the line:
Line 1: 3 long, 2 wide
Line 2: 2 long, 3 wide
Line 3: 1 long, 4 wide
2️⃣ Machine Basting
Cut one fabric piece in half lengthwise (two 4″ x 10″ pieces).
On the wrong side of one piece, draw a 10″ center line.
Place pieces right sides together, align raw edges, and pin perpendicular to the line.
Using the longest stitch length, sew along the line without backstitching.
3️⃣ Plain Seam — ½” Seam Allowance, Pressed Open
Cut one fabric piece in half lengthwise.
Place pieces right sides together, align raw edges, and pin perpendicular to the edge.
Stitch with a ½” seam allowance.
Press seam allowances open.
4️⃣ Plain Seam — ½” Seam Allowance, Topstitched
Follow steps for Plain Seam above.
After pressing seams open, press both seam allowances to one side.